

How To Draw Anime On Tablet
I'chiliad Juha Ekman, a.k.a Okuha, and I'1000 here to help yous get started with anime & manga fine art, make y'all more confident with your fine art skills, and teach you new cartoon techniques to get your creativity to another level.
Do you imagine what anime & manga art combined with confidence in your skills tin can give you? That'south what I'm here to help you lot discover.
I take been drawing for years already and went through an incredible transformation from a traditional artist to becoming a digital creative person.

It wasn't easy for sure, and we all outset from zero. So if you're feeling behind – don't worry. I'll give you a fast starting time to anime art and how to draw digitally.
Cull cartoon materials (Traditional Art Path)
Before we dive deep into creating anime and manga art, you have to cull whether you want to create anime art using traditional or digital mediums?
This guide slightly covers the traditional medium and how to apply pencil, paper, and eraser to create anime art. Notwithstanding, we mostly focus on creating anime art digitally in this guide.
Creating anime art using traditional medium
Traditional medium means using tools like paper, pencils, graphic pens, markers, etc., to create your anime art.

When I get-go started to draw anime fine art, I used a serial of pencils, mostly HB or 2B, to create the line fine art.

For inking, I used Sakura Pigma Micron Ink pens with varied thicknesses of 005, 05, and 01. This enabled me to draw a 0.twenty mm line width amidst other line widths.
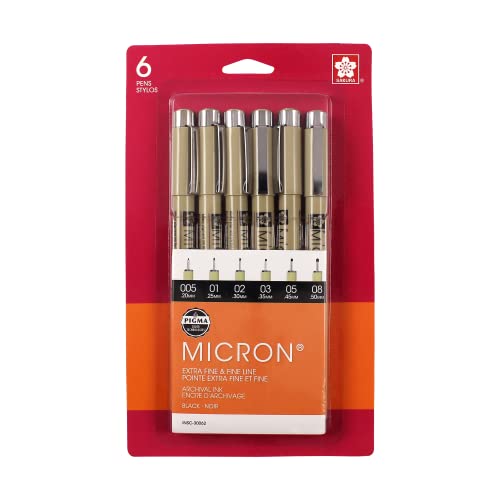
Sakura Pigma 30062 Micron Blister Card...
- THE GO-TO TOOL FOR Fine art Work & PLAY:...
- PRECISE POINTS & LINES: Create precise...
- Shine WRITING: Feel smoothen,...
- ARCHIVAL QUALITY: Pigma ink colors are...
- CERTIFIED NON TOXIC: Approved by ACMI...
For paper, I used a Copic alcohol marking pad by Transotype. I used this paper for its superb marker usage quality. If you are using Copic markers with basic A4 paper, information technology will more than likely bleed over your lines, and y'all are not able to go along the colors of the markers pure and bright.
Sale

Copic Marker XPBC 8-1/2-Inch past eleven-Inch...
- This high-quality white cardstock was...
- It features an ultra smooth and silky...
- It'south perfect for marking blending, is...
- This bundle contains 125 eight-1/2 by...
- Copic markers not included

For coloring, I used the ever famous Copic markers equally they are the best in the course for anime art. Copic markers give you pure colors with zero compromises.
And by using these markers with the correct paper, you are able to produce damn fine anime art drawings in no time.

Choose hardware and tools (Digital Art Path)
Fifty-fifty though I started my creative journey by using traditional tools, I soon felt slightly express past it. That's when I found digital art, digital drawing tablets, and the art world opened up to me in a whole new manner.
If you lot are just starting out and want to become into the digital art world, a good place to start is to know that yous demand the following equipment to draw digitally:
Must-have tools for creating digital fine art:
- Desktop figurer, laptop, or a tablet
- If yous choose a laptop or a desktop, and then you need to get a drawing tablet
- Art software
Agreement hardware
Now that iPad Pro, amongst other tablets, enable you to describe anime art at a professional level, yous might not even need a fully-fledged computer anymore. But you withal need art software.
The near important aspect of choosing whatever hardware, whether it be a tablet, desktop pc, or laptop, y'all demand a lot of RAM memory. You also need a proficient processor and a display that has rich colors.
RAM memory for drawing
RAM memory is not the aforementioned as HDD, SSD, or such memory. Ram memory (random-admission retentivity) is a class of computer retention that can be read and changed in any club, typically used to shop working data and machine code.
The primary point is that it does not store whatever files but is lighting fast at processing "files."
32GB of RAM memory is the best to become for if yous want to draw crisp, high-resolution anime drawings. 64GB is the next best to go, every bit it could be a scrap of an overkill in some cases, but and then once more, more than is better when it comes to RAM.
Sale Bestseller No. 1

Timetec 8GB DDR3L / DDR3 1600MHz...
- [Specs] DDR3L / DDR3 1600MHz PC3L-12800...
- [Size] Module Size: 8GB Packet: 1x8GB
- [Voltage] JEDEC standard 1.35V, this is...
- [Compatibility] Compatible with DDR3...
- [Color] PCB Color may exist different...
Auction Bestseller No. 2
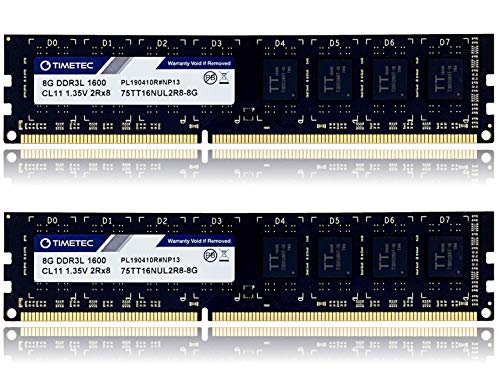
Timetec 16GB KIT(2x8GB) DDR3L / DDR3...
- DDR3L / DDR3 1600MHz PC3L-12800 /...
- Module Size: 16GB KIT(2x8GB Modules)...
- PCB Color may exist dissimilar (Black or...
- For DDR3 Desktop Uniform with Intel...
- Guaranteed Lifetime warranty from...
More than allocated memory for your art software, more speed to your cartoon process. But do behave in listen that increasing memory allocation also affects other software. So the other software might not be equally responsive as they were earlier.
HDD, SSD, M.2 Drive, Scratch Disk for cartoon
Thankfully we live in an era where SSD drives exist, and the speed of write/read operations has increased massively. SSD drives have enabled faster access times, loading times, writing times, and whatnot.
Bestseller No. 1
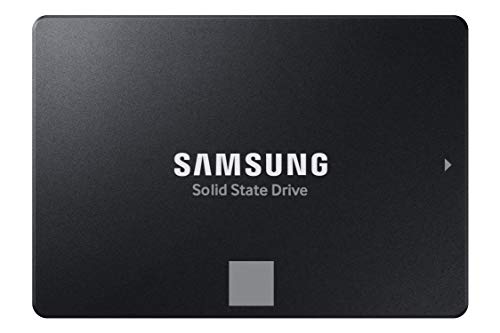
I am using M.two (Samsung 1TB 960 EVO – though it's already getting a flake onetime) bulldoze for the scratch disk simply as well every bit a working disk. This enables fast saving times, faster file processing, among other benefits.
The main benefit is that you can start drawing faster, save faster, and progress through the image faster.
I grew tired when I had a traditional HDD in identify, and loading and saving the drawings took like forever. And so when I built my new computer, I focused on speed and silence.
I did attain both, but it didn't come up cheap. I besides have a lot of artworks saved from different sites, like DeviantArt, Pixiv, Artstation, Behance, and so on, which as well reside on the M.2 drive.
That is because looking and finding inspiration and reference images with the old HDD were likewise ho-hum for me.
I want things to be washed fast, or at least the information should be acquired every bit fast as possible.
Efficiency and speed are a must for me. So I put an attempt (and coin) into it.
Also, practise consider the amount of space you might need for your artworks and work-in-progress files.
What I've seen with my work is that artworks roughly have 2Gb-4Gb of storage space from your hard drive (and that is for one artwork/folder). And to counter that storage demand, I've installed one 5Tb WD Red HDD to my desktop. And another as an external backup.
Sale Bestseller No. 1

Seagate BarraCuda 2TB Internal Difficult...
- Annotation: Graphics May Vary and Size (3.5")...
- Store more, compute faster, and exercise information technology...
- Build a powerhouse gaming computer or...
- The get to SATA hard bulldoze solution for...
- Confidently rely on internal hard drive...
Making the whole storage solution await like this:
- 1 x 1Tb G.2 SSD
- ane x 5Tb WD Red HDD
- 1 x 5Tb WD Ruby HDD for back up files
- 1 x Cloud Storage Backblaze (recommended)
Processor for cartoon digital art
You lot do not need a powerful processor to draw efficiently. However, when and if you desire to practice other tasks, similar zipping files or video editing. It would be best if you lot had a powerful processor.
Do go yourself an Intel processor. That is my get-to manufacturer when it comes to processors. Look for the latest model and selection either the all-time, second-best, or fifty-fifty the third-best that is currently in the market and does not cost a fortune equally some high-end models do.
Around 300$ is the price range to aim for.
Sale Bestseller No. i
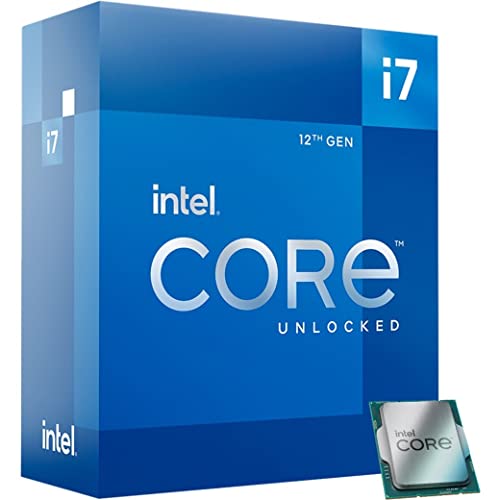
Intel Cadre i7-12700K Desktop Processor...
- Intel® Core® i7 3.sixty GHz processor...
- The processor features Socket LGA-1700...
- 25 MB of L3 enshroud to boost the...
- Intel 7 Architecture enables improved...
- To boost graphics and visual quality,...
Sale Bestseller No. 2
If you are building a small desktop pc, do also take into account the TDP (Thermal Design Power) of the processor as bigger and more than powerful processors volition quickly rut upward your pc, which is never a good thing, and it brings fan noise to irritative levels.
Best display for drawing
A display is probably i of the most important things you need. Yous have to have good color accurateness or color gamut, as some call it. Meaning that the brandish really shows the colors equally you intended. Reds are shown as reds and not as magenta, for example.
Look for a display with 99%+ Adobe RGB or 99%+ sRGB. This is somewhat a base standard to be expected from a display for professional cartoon. So aim for color accuracy over 4K and other things. Colour is the thing that matters.
Currently, yous can get 10K displays, but it seems similar 4K or 5K is the next standard for displays. 4K (3,840 by 2,160 pixels) resolution has 4 times the pixels institute in a 1080P monitor. Wide-Quad HD (WQHD) displays take a pixel ratio of 2,560 by 1,440 pixels, also known as 1440p.
Auction
SAMSUNG 32 inch UJ59 4k monitor...
- 32 inch 4K GAMING MONITOR provides...
- Widescreen monitor provides the enhanced...
- Minimize middle strain during long working...
- AMD FREESYNC synchronizes the refresh...
- CONNECT MULTIPLE DEVICES like laptop,...
What is also important is the I/O (input/output) connections the brandish offers. For you lot to go everything out of your monitor, brand sure it has DisplayPort 1.2 or greater. As well, HDMI should at least be at version 1.4, but still again, the bigger the version number, the better.
I currently accept an age-onetime HP LP2475w, but if at that place's one display I would more than likely buy today, it would be one from the Dell Ultrasharp monitor line or one from BenQ. Brands that I've trusted and accept seen perform in the monitor market.
Choosing desktop, laptop, or a tablet
Now that we have covered the most important aspects of hardware, at present it'southward time to choose the form of that hardware.
Whether you go for a tablet, desktop pc, or laptop does not matter in the end. What matters is the fact of whether you like to describe with a big screen or are you comfortable using a tablet for cartoon.
Also, what is worth mentioning is that the beefier (powerful) your hardware is, the faster y'all are able to create drawings.
While speed isn't everything you should care about, I've found it extremely pleasant when I can go to drawing pretty instantly and don't have to look for the files to load or layers to testify up.
So when you choose your hardware, proceed in mind whether you want information technology to be portable (laptop, tablet) or would you like to dedicate a place in your room for drawing (desktop pc).
I institute that I like to draw on a large screen and chose a desktop and drawing tablet equally my hardware.
One of the best laptops are:
Sale Bestseller No. one
NEW Microsoft Surface Book three - xv"...
- Nigh powerful Surface laptop yet, with...
- Fastest graphics on Surface, powered by...
- Power when you lot need it. Upward to 17.five hours...
- Robust laptop, powerful tablet, and...
- The connections y'all need, including...
Auction Bestseller No. 1
2020 Apple tree MacBook Pro with Apple tree M1...
- Apple-designed M1 fleck for a giant bound...
- Go more done with up to 20 hours of...
- 8-core CPU delivers upward to two.8x faster...
- 8-core GPU with upward to 5x faster graphics...
- 16-core Neural Engine for advanced...
And the below tabular array lists the very all-time tablet options for drawing:
Sale Bestseller No. 1
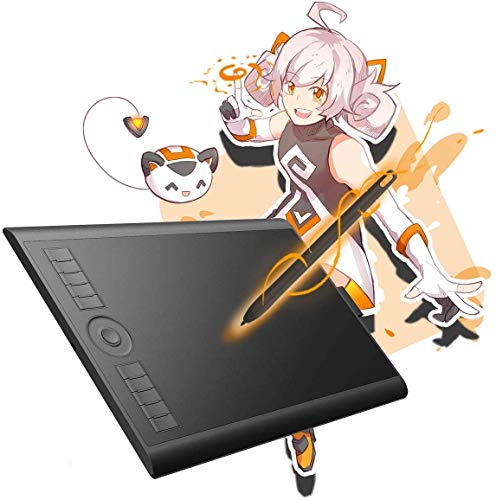
GAOMON M10K2018 10 x 6.25 inch Graphic...
- [Battery -free Stylus]---The pen adopts...
- [8192 Levels Pen Pressure]---The pen...
- [High Functioning]--Working Expanse:10 x...
- [1 Bear on Ring+1 Round Key+10...
- [Compatibility]---Windows 7/8/10, Mac...
Bestseller No. ane
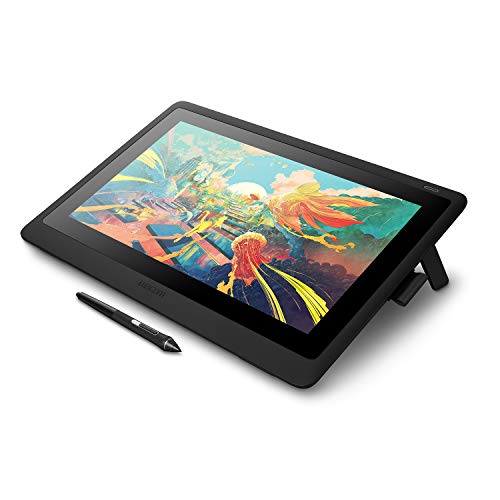
Wacom DTK1660K0A Cintiq sixteen Drawing...
- A more affordable pen Display with Wacom...
- Cintiq'due south xv.6 inch 1920x1080 Hard disk drive...
- See your creations in vibrant color on...
- Connect to your computer with the...
- Warning: Manufacturer's warranty is just...
Determination
Focus on RAM memory, processor, brandish, and file saving. When you have to wait for ages for something load, or when you are waiting for an outcome to render itself to your drawing. You wish you had focused on these things.
Information technology is granted that these things might cost a bit and maybe even more than, but what yous proceeds in speed, efficiency, united nations-interrupted workflow, smooth drawing procedure will brand up for the "loss" of coin. And these things do matter a lot when yous are in the menses land.
And have to say that it even enables you to go to the menstruum state easier, when the hardware is non the bottleneck, but more than your imagination and skills.
Choose A Drawing Tablet
A drawing tablet is a tablet that enables you to draw digitally using a stylus. Drawing tablets are separate hardware that yous connect to your reckoner.
Drawing tablet without a screen
When I outset started drawing digitally, I chose a tablet that didn't accept a display/ cartoon screen. My pick for the time was Wacom Bamboo. I drew with it a flake until I noticed that I didn't feel the disconnection of hand and middle.
When you don't have a screen, you accept to look at the monitor while you are drawing to the tablet.
Currently, the best drawing tablet without a screen is the Intuos serial past Wacom.
Sale Bestseller No. i
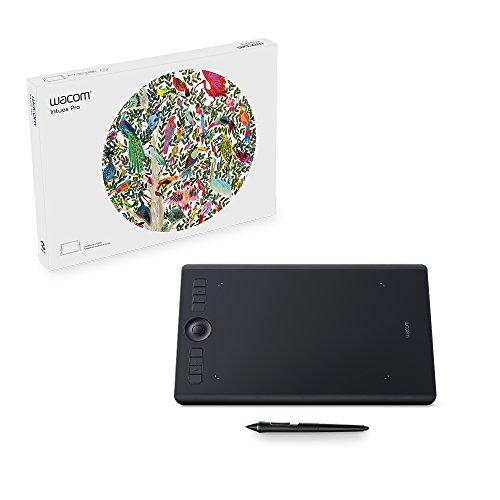
Wacom PTH660 Intuos Pro Digital Graphic...
- Wacom'south trusted professional Pro Pen 2...
- Slim tablet design in our near popular...
- The Pro Pen ii features 8,192 levels of...
- Speed your workflow with the multi-touch...
- System requirements: USB port, Windows seven...
Drawing tablet with a screen/display
Drawing tablet with a screen enables you to draw directly to the screen. Then the drawing feel is as close to cartoon a traditional paper equally information technology tin can.
After experiencing a lot of frustrating drawing moments with the Wacom Bamboo, I bought myself a new cartoon tablet, Wacom Cintiq 12WX. It was a game-changer for me and for the side by side 10 or and so years.
In 2020, I bought a new drawing tablet, and this fourth dimension I decided to buy the best you can buy in the market. Wacom Cintiq 24 Pro. I tin can but say that this drawing tablet has given me the best drawing experience ever.
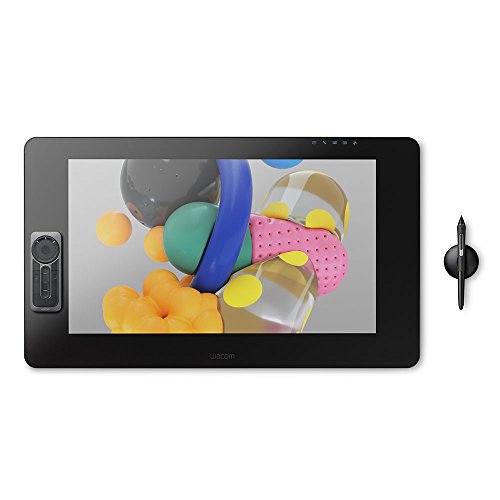
Wacom DTK2420K0 Cintiq Pro 24 Creative...
- Wacom'south about natural and advanced pen...
- 4K resolution (3840 x 2160 pixels) is...
- The Express Key Remote puts 17...
- The etched glass screen reduces glare...
- Connect Cintiq Pro 24 to your Mac (OS...
While the tablet that I bought is 1 of the most expensive drawing tablets on the market, information technology is besides the best. And when yous get the best, y'all know that hardware is non the bottleneck.
If, however, you are but starting out, getting the most expensive drawing tablet might not exist the best thing to do. So the second-all-time would be XP-PEN Artist 24 Pro. It costs roughly half of the Wacom but delivers infrequent performance and results.
Drawing stylus
A stylus is a pen that works with digital screens. Even so, almost every tablet in the market has a dedicated pen to information technology, which ways that you can't just purchase a stylus and use it with every screen out there.
Just when y'all purchase a tablet, you get a pen with it, so no worries at that place.
iPad Pro has a dedicated stylus for it, and for example, using a Huion stylus with Wacom tablets is not possible.
Decision
Drawing tablets come in many forms and shapes. Some have bigger screens, some have limited keys/ hotkeys, and some don't.
Then when buying a cartoon tablet, think about the space you take on your desk, calculate your upkeep, and recall about the way y'all would like to draw and work.
Using a portable drawing tablet, similar Wacom MobileStudio Pro:
Bestseller No. 1
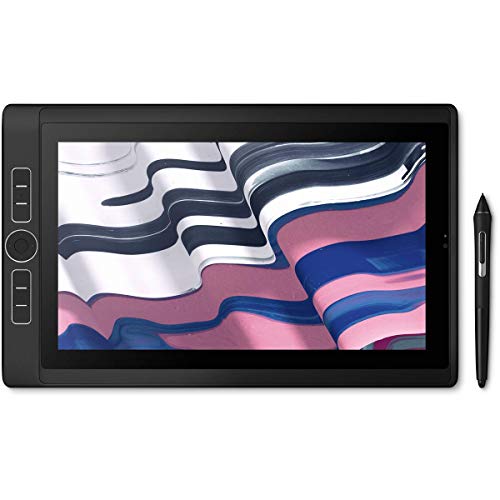
Wacom Mobile Studio Pro 13" Windows ten,...
- Our about powerful compact device all the same...
- Encounter your graphics & artwork in corking...
- Bask fast-processing and performance in...
- Extraordinary precision with the Wacom...
- Comes with 16GB arrangement retention and 512 GD...
Or an iPad volition greatly touch the manner you draw and create artworks.
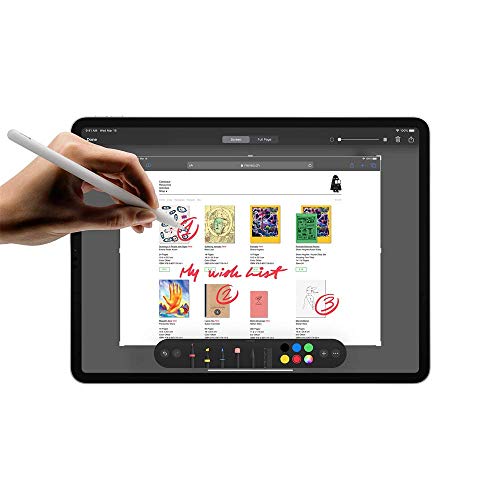
2020 Apple iPad Pro (12.nine-inch, Wi-Fi,...
- 12.9-inch edge-to-edge Liquid Retina...
- A12Z Bionic chip with Neural Engine
- 12MP Wide photographic camera, 10MP Ultra Wide...
- 7MP TrueDepth front camera
- Face up ID for secure authentication and...
Of course, you can choose both. Get yourself an iPad Pro and a Wacom, and if you choose this route, I advise you call back nearly how you save your files (cloud preferably), so y'all can access your files no matter what device you are using.
I chose a desktop setup, and I call up the biggest reason for that is the artistic workflow and the big screen estate.
Pick Art Software
Art software is the terminal piece of the tools you lot need to draw digital anime art. Art software is software only like Microsoft Discussion. But information technology just enables yous to draw with it.
There are complimentary art software and paid ones. And if y'all are serious about art, then we focus on the ones that have a price tag in them.
If you lot want to, you tin read virtually the best art software for anime fine art, but the below art software is considered to exist the all-time ones when it comes to drawing anime art.
- Prune Studio Paint
- Adobe Photoshop
- Rebelle
- Corel Painter
The reason why I recommend the above art software is because they have everything you need to draw professional person looking anime art.
Now in that location are a few things you should consider when starting out. What is your anime art style, and what is your budget for the art software?
Only rather than focusing on the budget, allow's focus on the style. At present, if you are going for a more painterly style, then I would recommend either Corel Painter or Rebelle. If you want an all-effectually good solution, Adobe Photoshop is the style to go.
Now, if you desire the best art software to draw professional anime fine art, then you lot become yourself Clip Studio Pigment.

I started with Adobe Photoshop CS4 dorsum in the days and used information technology for many years until I constitute Clip Studio Paint. After using Prune Studio Pigment for a few months, I saw how superior it was to Photoshop.
Later that, I completely switched my workflow to CSP and haven't regretted that decision e'er.
Nevertheless, I practise accept to say that information technology's not the software that will make great fine art; information technology'southward you who create the artworks. You can create not bad art with any software out at that place, but the fundamental to information technology is that y'all stick with i and learn the ins and outs of that software.
When you lot do that, so it doesn't matter which software you apply. Some software is amend, for instance, painting realistic looking oil paintings, whereas line art is best accomplished with another software (CSP).
My artworks feature a lot of line art, and I use cel shade every bit the coloring technique, and for that, Prune Studio Paint is phenomenal.
Learn The Art Fundamentals
Now that you know what hardware you need, and you might fifty-fifty accept selected software for yourself. Now information technology's time to actually draw your next masterpiece.
I've selected three master categories that you should know the basics of. I didn't select human anatomy because it could exist that yous want to draw anime environments and background fine art.
Colors
Colors and color theory plays a big part in anime art, but non at all in manga art. In that location'southward a departure between anime and manga, and when we are talking about anime, we use colors more than frequently.
There are three color categories:
Main Colors: Red, yellow and blue a.chiliad.a RYB, but not RGB
In traditional color theory (used in pigment and pigments), chief colors are the three colors that cannot be formed by any combination of other colors. However, all other colors are derived from these three hues/colors.
Secondary Colors: Green, orange and regal
These are the colors formed by mixing the main colors.
Tertiary Colors: Yellowish-orange, red-orangish, red-majestic, bluish-purple, blueish-green & yellow-light-green
These colors are formed by mixing a main and a secondary colour. That'south why the hue is a two-word name, such as blue-green, crimson-violet, and yellow-orange.
Colour Harmony
When talking about colour harmony, we are talking nearly how colors create a pleasing viewing experience. Harmony is something that is pleasing to the heart. And if you recall that every color is cute, that is not the case if you combine colors in an unpleasing way.
There is cute anime art out there, particularly in Makoto Shinkai's production, where the colors are so brilliantly selected that it creates an experience like nothing else.
Color schemes

There are many ways you lot tin create a colour palette, and below is a list fo those:
- Monochromatic
- Analogous
- Complementary
- Triad
- Divide-Complementary
- Double Dissever Complementary
- Square
- Compound
- Shades
Now, if yous just want to get yourself some nice color schemes, exercise check coolors website. It has plenty of crawly ready-fabricated color schemes for you lot to use.

Proportions, limerick, and rules
Proportions are everything when it comes to drawing human being anatomy, just also when it comes to drawing items, objects in 3D space. How objects bend in space is of import to create believable forms.
Still, nosotros do take to have a stride back and assess whether nosotros are cartoon realistic looking anime art, semi-realistic, or unrealistic anime art.
Because as you and I know, anime as an art course is all about breaking forms, angle shapes, and making things look ultra-beautiful while non being too realistic.
While proportions (for example, face proportions) are important, we shouldn't forget how proportions and rules play together. They are most the same thing. However, rules let you lot create interesting and pleasant drawings.
Having the emphasis in the right place lets yous guide the viewer'south middle exactly to the right spots, creating a visually pleasant experience for the viewer.
The most notable rules are the rule of thirds and the golden ratio. While not going too deep into where they come from, the main signal is that when you use those, you are ultimately creating a composition and proportions that please the eye.
Lite and shadow

Possibly the most important part of all art fundamentals is calorie-free and shadow. Calorie-free striking an object, and object, creating a shadow.
But to be honest with you, light and shadow are besides deep of a topic to go through in this post, so I will requite y'all the very basics so you can go started with your drawings.
One light source
The thing with light is that it e'er travels in a straight line. The shadows made by the low-cal ever work in direct response to whatever the light hits, whatever angle the light is coming from, and of course, the intensity of the light source.
So when you are creating your anime drawings, recall almost the lite source, think how it will the forms and how long or curt the shadow could exist.
If you don't accept a reference drawing next to you, try to use your imagination or find a reference that resembles your drawing. And then you could see or imagine how the light and shadows would piece of work in your cartoon.
When you introduce some other light source, the image gets more depth but also more complexity, which in plough could demotivate you to depict the drawing further.
Start uncomplicated, and only use ane light source, and when you are a bit more than experienced creative person, introduce another light source.
Light and shadow rendering categories:
- Ambient apoplexy
- Key light shadow
- Bounce/Fill up low-cal
- Ambient Light
- Subsurface scattering
Drawing Anime Face up Front view
The master thing yous need to know well-nigh drawing anime faces is that the facial features are exaggerated, the eyes (specially with teen girls) are big, the mouth is big (but can also be but a dot), and the head, in general, is big compared to the balance of the body.

Drawing anime eyes
When cartoon anime eyes, there few cardinal things you need to consider, and that is the historic period of the character. If you are cartoon a teen girl, you draw big eyes or in a not-continuous style (upper and lower eyelids do non connect).
If y'all're drawing a more mature anime character, you should draw slightly slimmer eyes, and preferably in a continuous fashion (connecting the upper and lower eyelids).

Drawing anime olfactory organ
Drawing anime nose is pretty interesting because you lot can depict the nose very realistically, or y'all can just not draw it all. You lot tin draw a dot, a triangle looking pointy nose, or equally realistically as you lot want.
In anime art, the nose has a special identify in facial features, as it has to follow the style of the eyes. Drawing realistic-looking optics, and drawing just a dot for the olfactory organ, will not create the most pleasant viewing experience.
And then when you are drawing an anime olfactory organ, think through the graphic symbol's historic period and whether you are using continuous or not-continuous style.

Drawing anime oral fissure and lips
All the same again, an interesting facial feature, which you draw with a single line, or by taking the realistic approach and drawing lumptious lips and rich teeth and and then on.
When drawing the rima oris, just like before, think about the way that you are drawing in. All facial features must connect with each other in a consistent way.
Mature characters more often have more defined facial features than teen and kid characters.
Anime face guidelines (front view)
When drawing the face up from the front end view, I commencement the drawing procedure by commencement drawing the eyes, then the olfactory organ, and and then the mouth. The key to drawing visually stunning and beautiful anime faces is to separate the eyes into three evenly placed rectangles.
And then the side by side thing for you to do is depict an evenly sided triangle then that the point of the triangle is pointing down and the other corners are aligned with pupils.
This is a rough measurement, just normally, this guide creates very pleasing and beautiful anime faces.
Anime face guidelines (profile view)
Drawing an anime face from a profile view is actually pretty like shooting fish in a barrel when you kind of realize that information technology can almost have whatever class.
What I hateful here is that the key placements are for the eye, nose, and ear. Perhaps fifty-fifty the back of the head, but the forehead, chin, mouth, eyebrows, etc., tin be very imaginative.
I starting time by drawing an eye, and then the nose, brow, chin, and the final being the neck and the rest of the body.
If there'south i guide I can requite you, it is to place the ear roughly in the middle of the head. Otherwise, I like to keep things pretty loose and open up to imagination.
Draw Anime Trunk
Drawing anatomically right anime and manga characters is non an easy chore for anyone. Maybe Kim Jung Gi is one of those grandmasters who can draw annihilation correctly in any position and Proko, to name a few.
When it comes to anatomy in anime and manga art, you tin either follow the usual path, where y'all draw the man body like it is. However, anime and manga style enables you to draw homo anatomy in a very different way too. In a very unrealistic style if you so choose to.
Anime and manga are all about breaking the rules, breaking forms, and molding them dorsum together to create sensational poses and figures.
In anime fine art, you can draw hands, legs, and torsos twisted in every manner, just the cardinal for body parts to expect believable is proportions.
You have to nail proportions for the anatomy to look conceivable.
Using 3D models to draw anatomy
There are ways to go around drawing proportionally right beefcake, and that is by using 3D models. There is a couple of software that let you do this, but my favorite is Prune Studio Pigment.
While Clip Studio Paint is the best in the market drawing software for anime fine art, it likewise provides a very customizable and piece of cake to use 3D modeling feature.
I utilize the feature all the time, and I feel like I couldn't live without information technology. I nonetheless practice, withal, believe that you should study anatomy and the chief muscle groups, and that leads me to the best instructor for that. Proko.
Learning to draw human anatomy
information technology's non easy to depict human anatomy, only with the correct guidance, it becomes so much easier. If there's one instructor who knows his stuff, it'south Proko.
Proko has online courses and tutorials for you lot to acquire how to describe correct anatomy, and it's all taught past an artist well-known in the area.
Muscle groups, proportions, and bone movement are all the things you demand to draw conceivable human anatomy.
Reference stock images
Now, if you would only similar to draw without guidance, then stock images are a expert way to practice. There are plenty of good anime fine art sites to discover reference images for drawing an anime trunk.
But possibly the nigh convenient one is Pinterest. Pinterest offers you a ton of content when it comes to anime and manga art.
All you lot demand to do is click the search bar and insert the affair you would like to become images and drawings for.
I recall the best drawing to practice from sketches and non completed artworks because sometimes the sketches reveal parts that are not visible anymore in the final artwork.
Sketches also enable you to describe the concept farther if that is your thing.
Another style to practice beefcake drawing is to use sites like Practice Anatomy or Quick Poses.
Coloring The Drawing

When information technology comes to coloring, you accept a few options: cel shading or soft rendering. While there are enough of other means to color, nosotros will focus on these two considering they are the most used ones.
I personally color using cel shading style, but in the past, I did soft rendering and constitute it to be much fun. However, as fourth dimension went past, I barbarous in love with cel shading and have stayed on that path always since.
Cel shading

Cel shading is all about using flat colors to convey shadow and base colors. Cel shading comes from the use of celluloid sheets (in the by) where the animator drew the artwork/animation frame to information technology.
These are non that much used anymore in the modernistic anime creation procedure, merely cel shading came from using those celluloid sheets.
Cel shading is an extremely simple and easiest identify to start learning the colors and coloring process in general.
I started by doing soft rendering and went to an easier coloring form, only even though cel shade looks simple and information technology somewhat is, it's super hard to master.
You see, in cel shading, y'all are using only apartment colors on acme of each other until you create shadows with the aid of a multiply layer mode on top of the flat colors.
In a way, you are creating a hierarchy inside the fine art software, where every layer has its own place and outcome on the finish outcome. Information technology's the way I color and have seen the all-time way for me.
A very structured mode to color, but at the same fourth dimension very manageable and like shooting fish in a barrel to control.
Soft Rendering

Soft rendering works very differently than cel shading. In cel shading, y'all used flat colors and stacked them layer by layer, creating a shadow with multiply layer mode or by irresolute the value of the color.
In soft rendering, you are gradually introducing new colors to the layer and mix them by hitting the ALT-cardinal continuously.
In soft rendering, the goal is to use a difficult-edged brush and gradually mix two or more colors together. If you use an airbrush or a very soft edged-brush, the results do not look good.
You demand to gradually mix the 2 colors together. That's the big cloak-and-dagger at that place is to gradual and soft rendering.
Finalize The Drawing
When it comes to finalizing a drawing, y'all might already feel like there's no room to improve the drawing or that there'southward nothing to change.
I advise you lot leave the work to the WIP (work-in-progress) folder for a few days and bring some fresh optics after those few days to run across if in that location'southward everything just like you want it.
I tend to rush my drawings in the terminate considering I would already like to show them to the world and start a new ane.
Nonetheless, the best works I have e'er get through a few steps before they come across the daylight. These are 20%-rule, color correction, line fine art adjustments, effects, background check.
That 20%

It's those concluding moments yous spend with your artwork before yous testify it to the public. Information technology'due south that last 20% yous should employ to your drawing, and if you are wondering what that might be, information technology's the final few details and color corrections yous demand to do. Merely to make sure, it's the best of quality you can produce.
When you create a new drawing, and you experience like it's done. Leave it in the WIP binder equally mentioned before, and then add those concluding details and adjustments to the cartoon.
Trust me; it volition make all the departure when you put a fleck of endeavour at the very cease to the artwork at hand.
It might feel like yous don't accept the energy or the willpower to add anything to it anymore, or you lot might even get bored with the artwork (information technology happens a lot to me) and would just like to offset a new one. My suggestion is to stick with it and add the final adjustments to the drawing.
Color correction

I Beloved colors and hate them. And the hating part comes from the fact that there are as well many colors to choose from. I love them all and would like to use every color variation there is in my works.
Nonetheless, at some point, you just have to make up your mind and settle on a color scheme, and when that'southward done, then you yet take to make sure every color works with each other.
You can hands employ Adobe Photoshop'due south color adjustment options like Hue /Saturation, Levels, Brightness/Contrast, Color Balance, Aqueduct Mixer, amid others, to adjust the colors to their final stage.
Line art adjustments
If you are doing line fine art heavy work, information technology's not a bad thought to slightly chop away the super crispness of the line art past adding a bit of mistiness to them.
Past adding a Gaussian Blur to the line art, slightly making the line fine art softer, will also make the line art blend a chip more to the colors beneath it.
This is optional, and sometimes I do this, and sometimes I don't. It depends on the mood and what I want to terminate piece to look like.
As well, changing the opacity of the line art layer is 1 way to make the line art layer work better with the colors beneath it. If you want the line art layer to blend a chip more than to the colors, some blur and opacity change might be a good idea to exercise.
Effects

Past effects, I mean accompanying elements. Something that is complementing the drawing and adding a bit of menstruum to it. As you can see from the case drawing below, there are these menses lines at that place that don't inherently take a meaning other than just making the drawing await a flake more interesting.
And so it might non be a bad thought to retrieve about adding some final effects to the cartoon, to tie the whole cartoon to its final grade.
Background
If you are an environs creative person in the anime art area, then this part does non utilise to you lot. You have it already covered.
However, if you are mainly drawing characters, then drawing the background tin be a claiming. And the reason for that is because drawing environment or backgrounds is non your point of interest and passion.
What I've found is that drawing something to the background, even something tiny, small, and insignificant, tin can already make the drawing look that much improve.
I have added to some of my artworks few different color hues to the background, and even those little tricks already break the otherwise irksome background.
Recollect that drawings should look interesting, and even adding a flat color rectangle to the background can already have your drawing to the side by side level.
Share Your Drawing
When I put my first artwork online, I was super nervous. I feared that my artwork would be rejected somehow, disliked, judged, and only bashed.
Only that wasn't the case. I received critiques, compliments, likes, and and then on. Just at the end of the day, information technology doesn't matter what others think about your works.
You lot care for your artworks, and yous share them with others, and if you lot desire to learn, y'all ask for critique. Only the one matter you shouldn't exercise is care about likes and dislikes.
We, as artistic persons, share something that is personal to u.s.a., and we shouldn't care how others have it. If they enjoy your artwork, adept. If they don't enjoy information technology, it's ok too.
Sharing your artwork for the first time is scary, but when you do information technology more than and more, it becomes natural, and soon there'southward nothing to fright of it anymore.
The best places to share your artworks are art sites like Artstation, Behance, DeviantArt, or a social platform like Instagram.
Also, Facebook groups are a fantastic mode to proceeds accomplish and audience when you lot are merely starting out. Considering let's confront information technology, when you create your Instagram account, there ain't that many people who will immediately follow you.
So yous will accept to grow your audience niggling past piffling, and Facebook groups are fantastic for that.
Conclusion
This guide is pretty in-depth, and I still feel like it is missing a lot. I tried to make this as complete equally possible, but if there's anything more I can give, information technology's through my Patreon folio.
Drawing anime art is not always easy, but I remember it'southward one of the easiest art forms y'all can start with. While anime art does follow the rules of reality, anime art also enables you lot to suspension those rules and withal make believable art.
Anime and manga art is the best class of art, I know. Information technology'south the most beautiful one and the one art form I volition ever draw and improve on.
I promise this guide helps you to start drawing anime art confidently. While materials and tools do not determine the success of your art, it does help you lot to draw efficiently, joyfully, and enables you to grow every bit an artist.
I have always invested in my fine art equipment and believe that with the right equipment, you amend your skills equally the tools are not blocking your progress.
Thank yous for checking this guide, and if you feel similar someone could do good from this guide, don't forget to share it. Thanks!

Source: https://okuha.com/how-to-draw-anime-art/
Posted by: cainrothe1964.blogspot.com
0 Response to "How To Draw Anime On Tablet"
Post a Comment